
Field Mapping
To access the MT Seed Potato Certification Database please login here.
In order to use the database, you will need an administrator to provide access via email. To request access, please contact your MT Seed Potato Certification Staff.
Tutorial Video - Creating & Mapping Fields.
Please watch the video on how to map your fields.
Finished with the Video?
Please navigate to other instructional videos covering the introduction and editing user information,seed lot registration,querying and reports, and requesting health certificates.
Still have Questions?
To schedule an online training session with one of our MSU Seed Certification Staff Members, please email Potatocert@montana.edu
Creating & Mapping a Field - Instructions
Here are some short instructions on how to create & Map a field(s).
- Open an Internet browser (Chrome, Mozilla Firefox, or Safari) and enterhttps://seedpotato.montana.edu into the address bar. Using your cursor, click on the Login icon at the top right corner of your screen and enter your credentials.
2. Click Main Menu > View Lots > Create Fields.
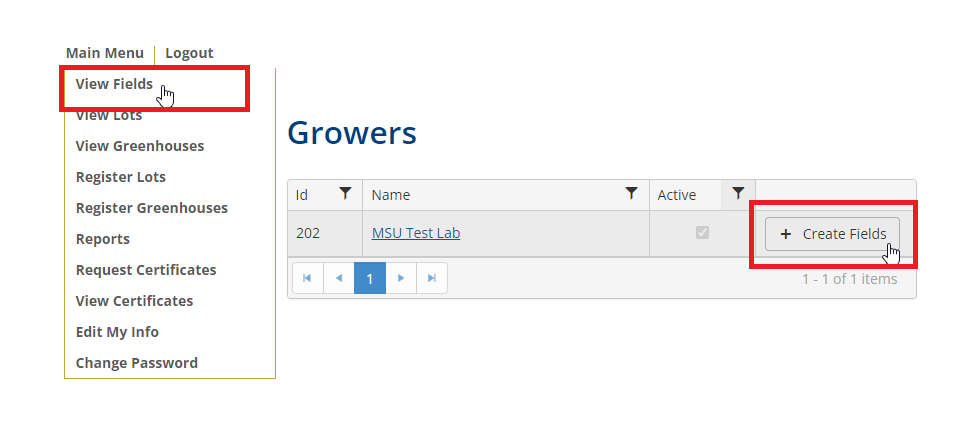
3. The first option in the Field Creation Page is to specify the default geographic center. Each time you open the satellite map the default geographic center will be displayed. Users can choose this center based on a physical address or latitude and longitude. Once the default geographic center has been specified, click on the + New Field icon to map the location of your first seed lot.

4. The Google Earth interface will be displayed on the default geographic center entered on the previous menu. Notice there are four icons at the top of the page, a hand, circle, polygon, and rectangle. Users will use google earth to find the location of each field and use the appropriate tools to draw their maps. For full center pivots (One seed lot), use the circle icon. If a center pivot has two seed lots present (half pivot), use the polygon tool. If a field is square or rectangular, use the rectangle tool. The hand tool can be used to move the map.

NOTE: Each seed lot must have its own field, with the exception of Nuclear & G1 seed lots.
5. In this first example, the rectangle icon is used to draw a rectangular shape around field. This field could be an example of a nuclear or G1 field. Users can enter an approiate name for the field enter a rotation type, year, elevation, and soil pH. The Latitude and Longitude are filled in by default. Click the Update icon to finalize this field.

6. Clicking on the Update icon will return users to the previous menu. Click on the + New Field icon to repeat the process until all fields have been added.

7. Previously entered fields will be shaded and outlined in red on the map. In this next example, the polygon tool will be used to draw points around the shape of a polygon. In this example the field will be used as a nuclear field.

8. In this next example, we will use the polygon tool to draw a half pivot. If users have one center pivot with multiple seed lots, growers must use the polygon to distinguish each seed lot. In the example below, the name is given “Pivot 1 West”.

9. Repeat the step above using the polygon feature to fill in the remaining center pivot with an additional field. This feature is useful when a single center pivot has more than one seed lot.

10. Using the circle icon, growers can map an entire center pivot. The circle icon should be used if a single seed lot constitutes an entire center pivot. In the example below, the center pivot is named pivot 3.

11. All mapped fields will be displayed in the table at the bottom of the Create Fields

12. Once satisfied, you can now register your seed lots by clicking Main Menu > View Lots > Create Lots.

13. Fill out the Variety, Generation, Seed Supplier, and Supplier Seed Lot Identifier fields and click + New Lot, notice that the Field ID field is required. This is a drop-down list which references all fields from the Create Fields page. Select the appropriate field, enter the acreage and planting date. Click Update to save that seed lot.

Click on the Register Lots icon to Register these seed lots.